Features |
Verify |
Set up |
Single Sig |
Multisig

What is Sparrow Wallet?
Sparrow is a desktop only bitcoin wallet, available on all major platforms that provides a fantastic alternative to Electrum or Specter. Sparrow provides huge amounts of detail to the user relating to their UTXO’s, transactions and balances, but does so in a very user friendly manner.
Features
Sparrow Wallet comes with everything you’d expect from a desktop based wallet, and much more…
- Own node backing (via Electrum server or Bitcoin Core)
- Ability to connect to pre selected public Electrum servers for those without their own node
- Ability to broadcast through Tor network using an external node
- Wallet imports (including Electrum)
- All major hardware wallet support (including air gapped devices)
- Coin selection and labelling
- Multi-Sig
- PSBT
- Watch only wallets
- Custom derivation paths
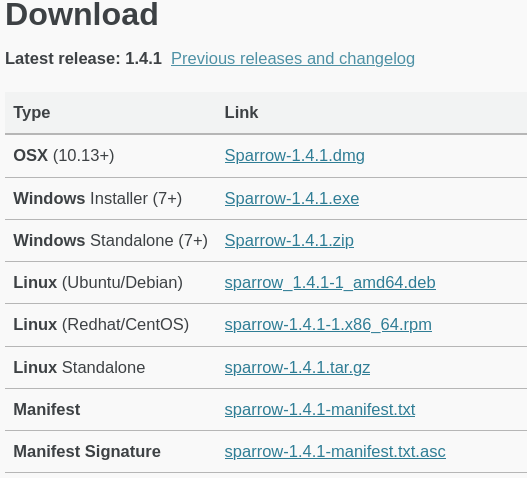
Download and verify Sparrow Wallet
- Download Sparrow Wallet for your chosen operating system
- Download the
Manifest.txt+Manifest.ascfiles
- Import Craig Raw’s public key
curl https://keybase.io/craigraw/pgp_keys.asc | gpg --import

-
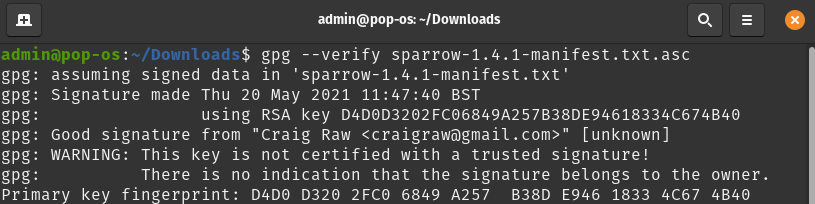
Open your downloads folder in the terminal and run
gpg --verify sparrow-1.4.1-manifest.txt.asc -
Look for ‘Good signature from “Craig Raw craigraw@gmail.com”. This confirms the file came from the entity in control of Craig Raw’s private GPG key
- Run
sha256sum sparrow_1.4.1-1_amd64.deb

- Open the
Manifest.txtfile you downloaded earlier and check that the hash provided matches the one shown in your terminal window. A match confirms the contents of the file you downloaded are an exact match to the one built by Craig when he signed these files

If you’re using Windows, there’s a guide for installation and verification of Sparrow here.
Initial Set up

Sparrow Wallet offers users 3 ways to get started, each with their own pro’s and con’s.
| Server Type | Trade-off | Positives |
|---|---|---|
| Pre selected public Electrum Server | Not your own hardware and shares wallet information with the entity running the server | Easiest way to get started |
| Private Bitcoin Core node | Wallet imports can take a while and uses Bitcoin Core which stores it’s wallets unencrypted | Next easiest setup type (user can just download Bitcoin Core) |
| Private Electrum Server | Biggest barrier to entry | Most private option + provides fastest wallet queries |
The Public Electrum Server’s provided have been selected due to their record of respecting users privacy. However, running your own is always be the best option.
After reading through the initial welcome screens, click ‘Configure Server’. Sparrow will default to a public Electrum Server but for the purpose of the rest of this guide, we will be connecting to a private Electrum Server. Select that option from the menu at the top.
- Enter your Electrum Server onion address (or local IP address)
- Set the port to
50001 - Toggle
Use SSLoff - Specify optional Tor proxy and port (if you don’t know what this means, leave these boxes blank)
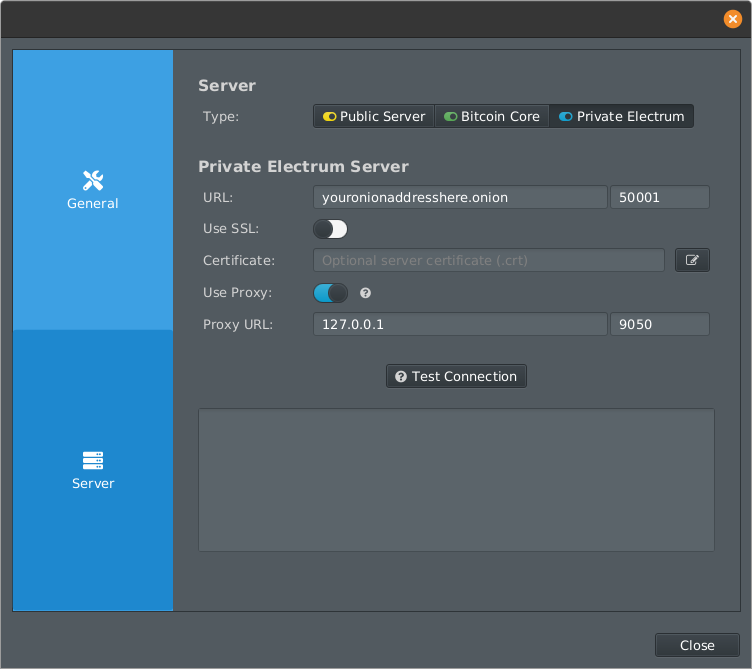
- Click ‘Test Connection’. After a brief wait you will see a successful connection notification.
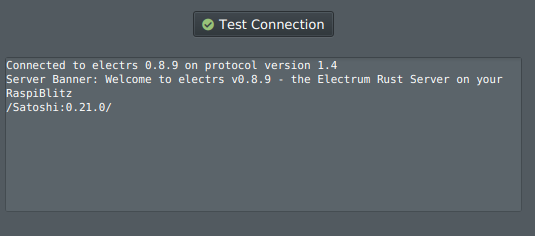
If connection is unsuccessful try changing the top right box to
50002and togglingUse SSLto on.
For those with an Umbrel node, you can follow this guide by Athena Alpha that outlines how to connect Sparrow to your own Umbrel node using the Electrs app. They also have a guide showing how to connect Sparrow to Bitcoin Core as well.
Importing your Coldcard
The following assumes that you have already initiated your Coldcard. If you have yet to do so, you can follow this guide.
- On your Coldcard go to
Advanced>Micro SD>Export Wallet>Generic JSON.
This will make a copy of your wallet onto your SD card that is readable by Sparrow Wallet. You can find more detail on this here. Once complete put the SD card into your computer.
- In Sparrow, go to
File>Import Wallet>Import File.
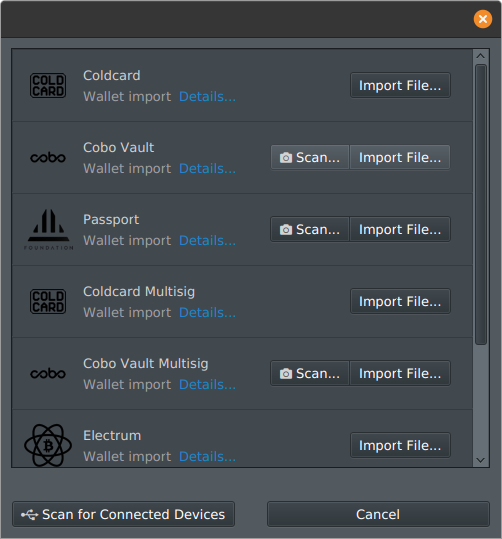
- Choose the
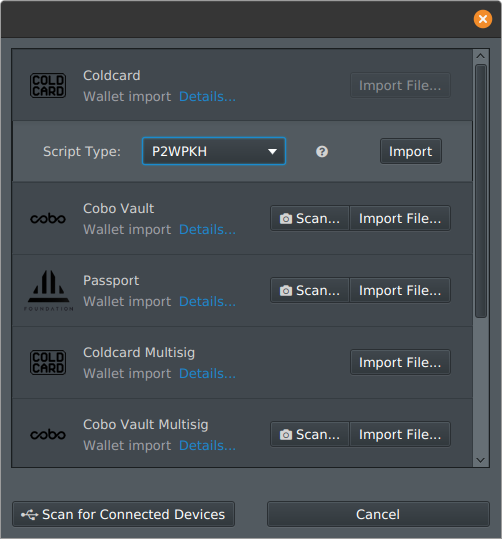
coldcard-export.jsonon the SD card. - Select the script type and press
Import.
P2PKH = ‘Legacy’ addresses starting with a
1P2SH-P2WPKH = ‘Segwit’ compatibility addresses starting with a3P2WPKH = ‘Native Segwit’ addresses starting withBC1
- Choose a name for your wallet.
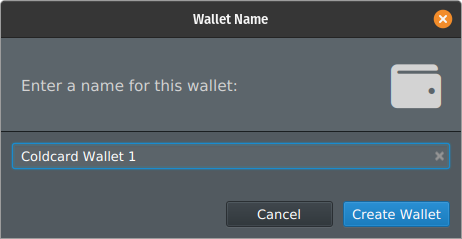
- Give your wallet an optional password. This password is specific to Sparrow and has nothing to do with the underlying seed.

- That’s it! You should now see your home screen with your Cold Card transactions and balances. (This is a brand new empty wallet shown below).

Receive a transaction
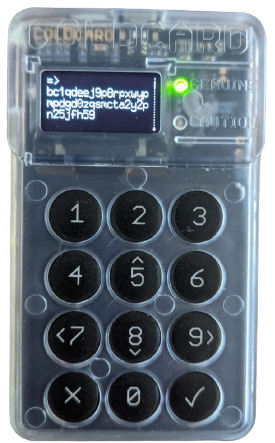
- Go to the receive tab to view your first receive address. You can then share the address or QR code with whoever is sending you bitcoin.
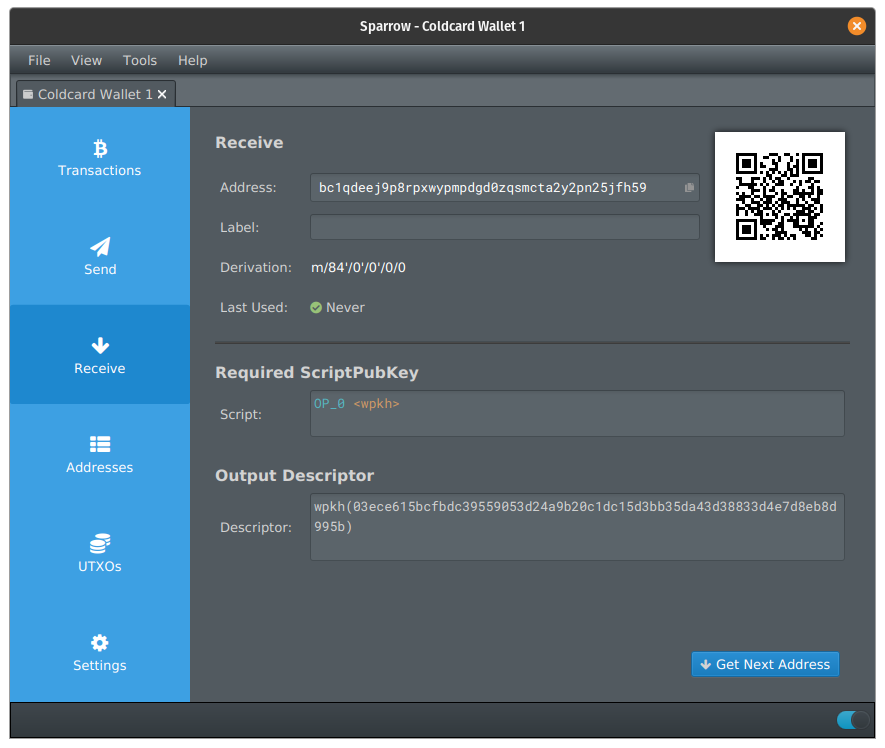
- You should always verify the receive address on your Coldcard.
Sending a transaction
Using these steps the wallet will choose which UTXO’s it spends for you.
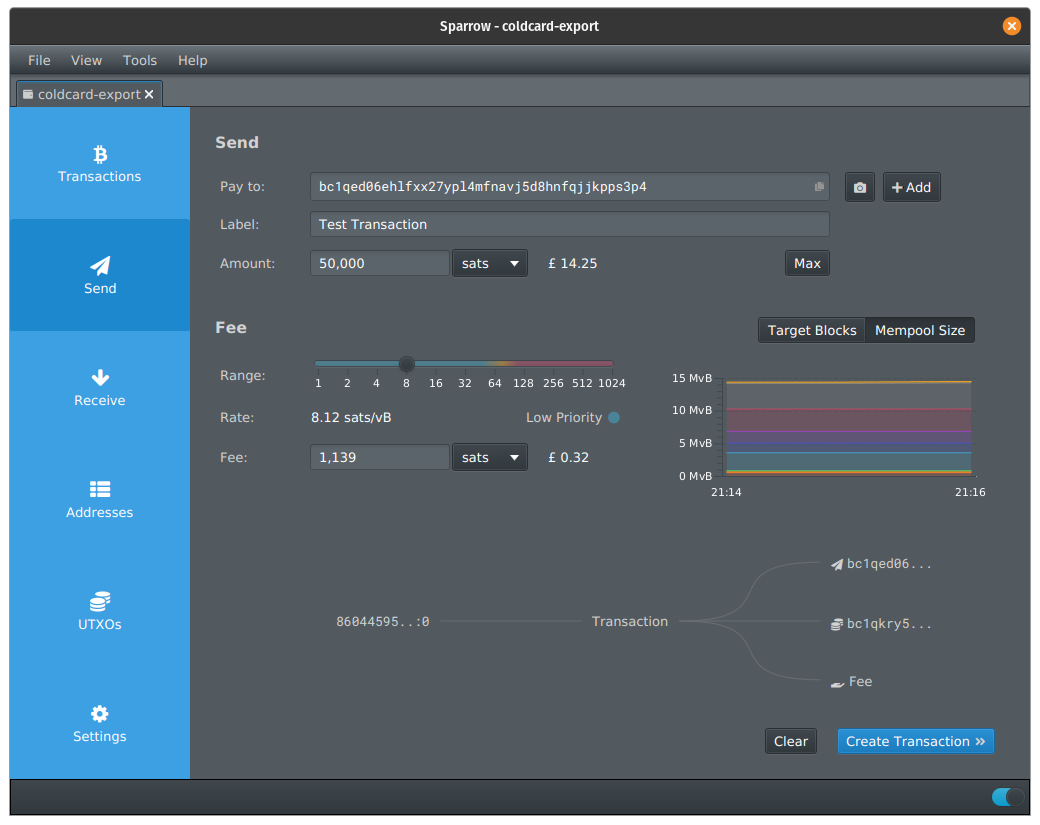
- Go to the send tab
- Paste the address you are sending to
- Enter the amount and adjust your fee rate
- Press
Create transaction
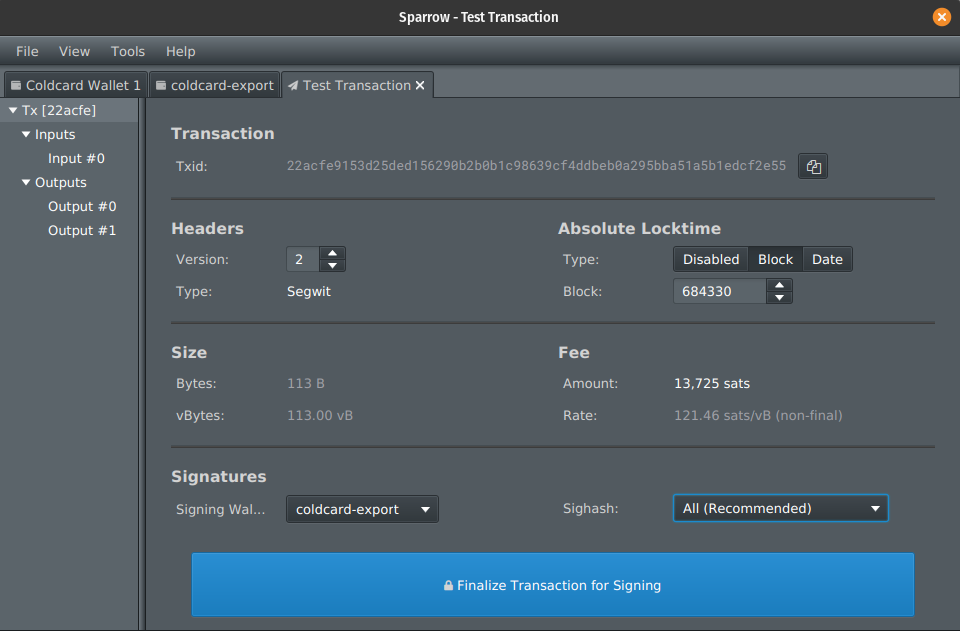
- The next screen provides an incredibly detailed breakdown for the more advanced user to fine tune so more technical details where required. For most users the default settings will be fine, click
Finalize transaction for signing
- Click
Save PSBTand select the SD card as the save location
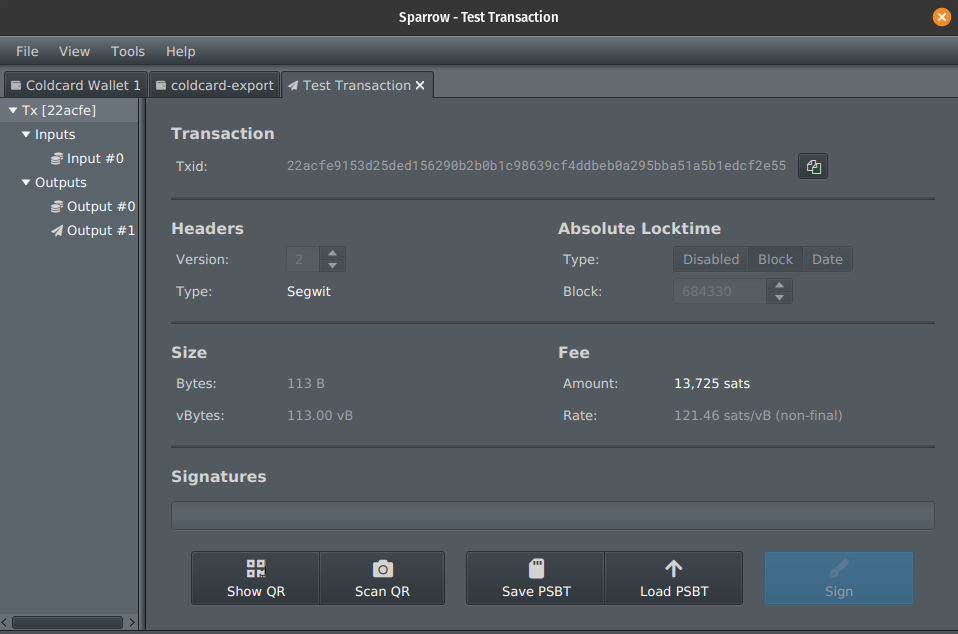
- Pass the SD card back to your Coldcard and click
Ready to Sign - Choose the file name of the
.psbtfile you just saved from Sparrow - Review the transaction details and press
sign - The Coldcard will now save a
signed.psbtfile to the SD card
To broadcast the transaction…
- Load the SD card back into your computer
- In Sparrow press
Load PSBT - Choose the signed PSBT file on the SD card
- You can now have a final review of the details and broadcast the transaction to the network
Spending using specific UTXO(s)
- Go to the
UTXOtab - Select all of the UTXO’s you want to use to create your transaction
- Press
send selected - Follow the steps outlined in the previous section
Creating a multisig wallet
As well as being fantastic at single sig support, it also excels at multisig! This section assumes that you have already initiated these devices, if you have not already done so, follow these steps.
Here is a brief run down of setting up a 2-of-3 quorum using Sparrow.
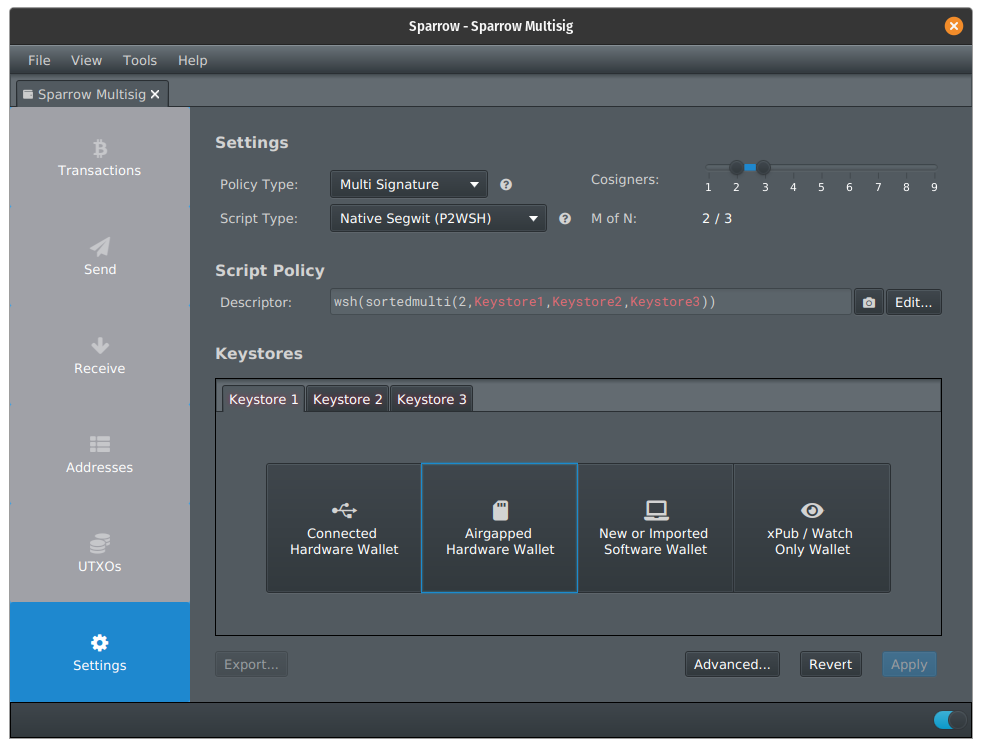
- Click
File>New Wallet, give the wallet a name then clickCreate new wallet - Change the
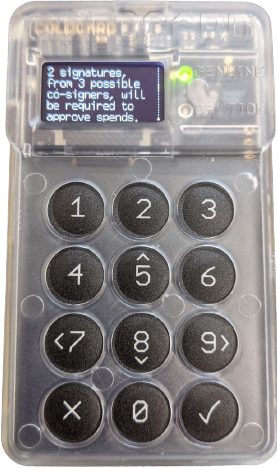
Policy TypetoMulti Signature - Choose your cosigner setup (we are using 2-of-3 here)
Coldcard Import
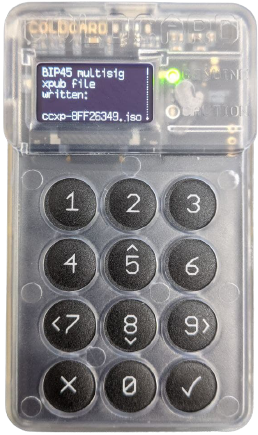
- Ensure the SD card is inserted into the Coldcard then go to
Settings>Multisig Wallets>Export XPUB - The Coldcard will save a file that looks like
ccxp-8ff26349.jsonto the SD card - Pass the SD card back to your computer
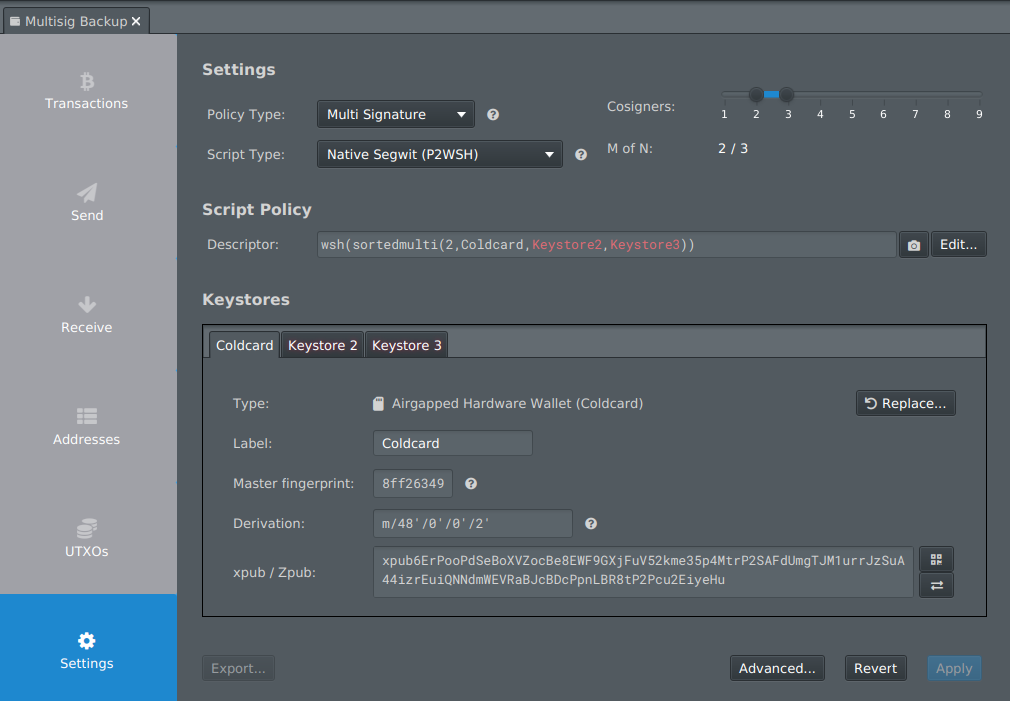
- In Sparrow ensure Keystore 1 is selected and press Air Gapped Hardware Wallet
- Choose
Import Filenext toColdcard Multisig
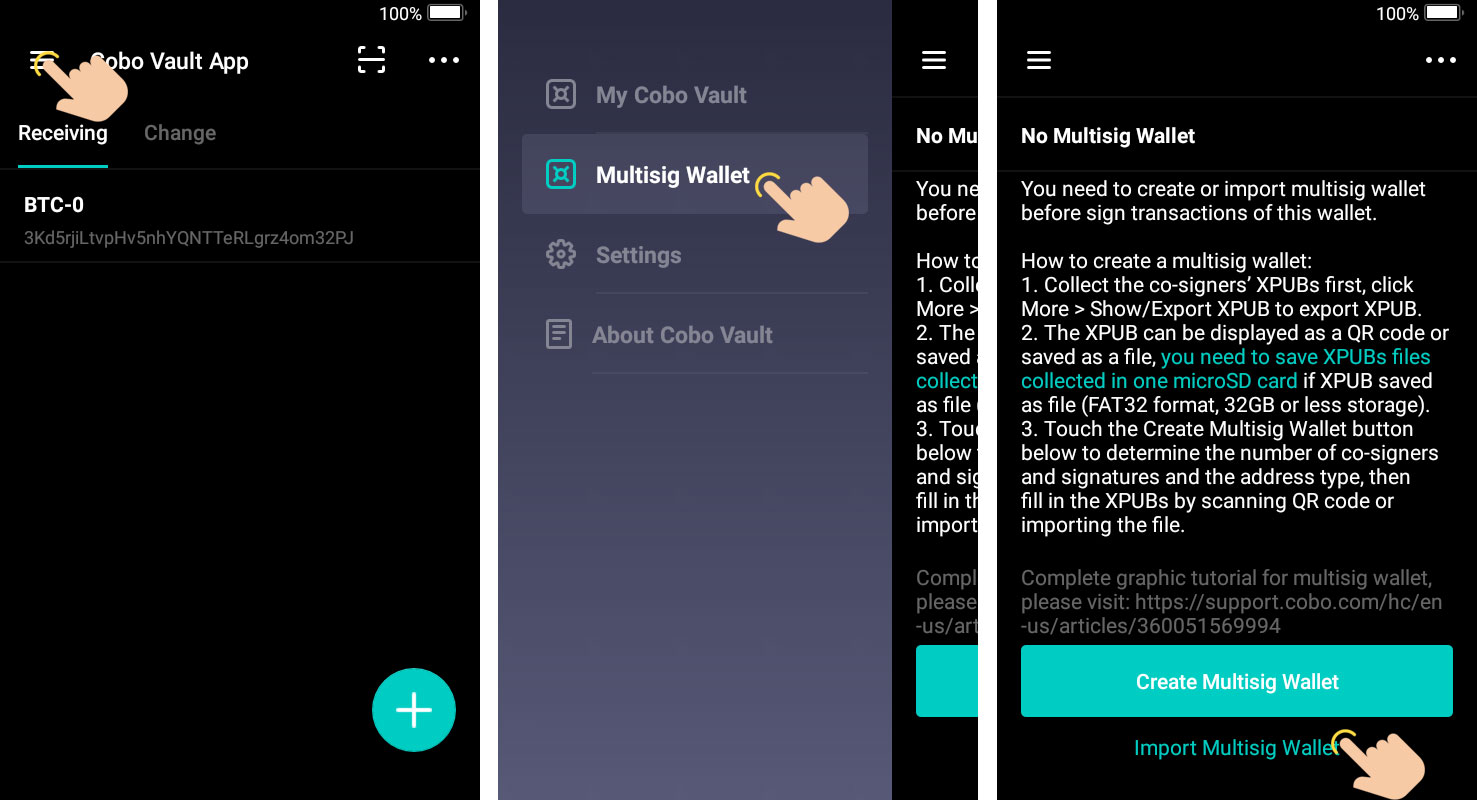
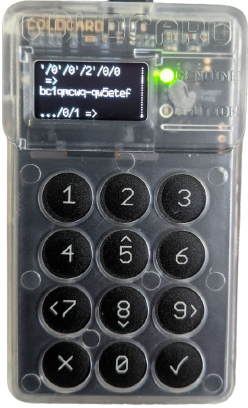
Cobo Vault Import
- Open the menu with the button in the top left of the screen then press
Multisig Wallet.
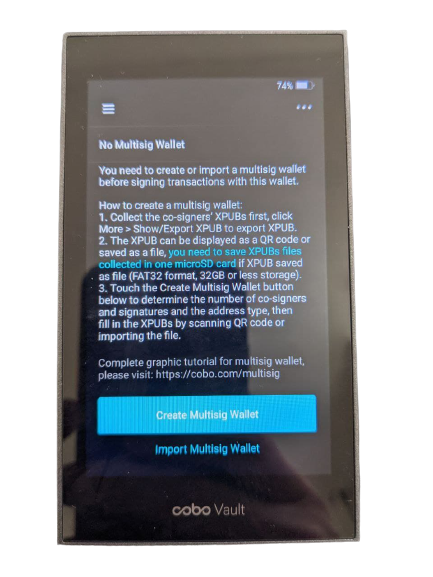
- Tap the three dots in the top right corner then
Show/Export XPUB. This will bring up a QR on screen.
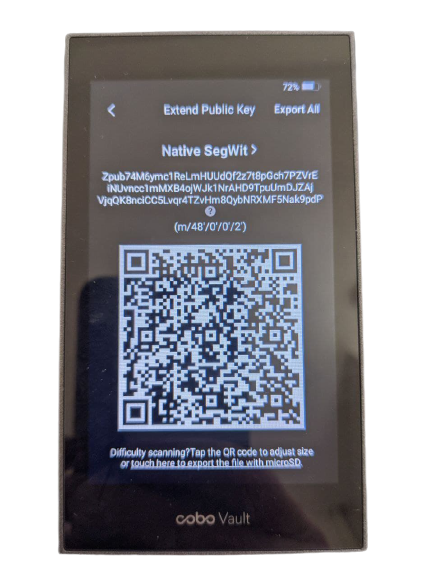
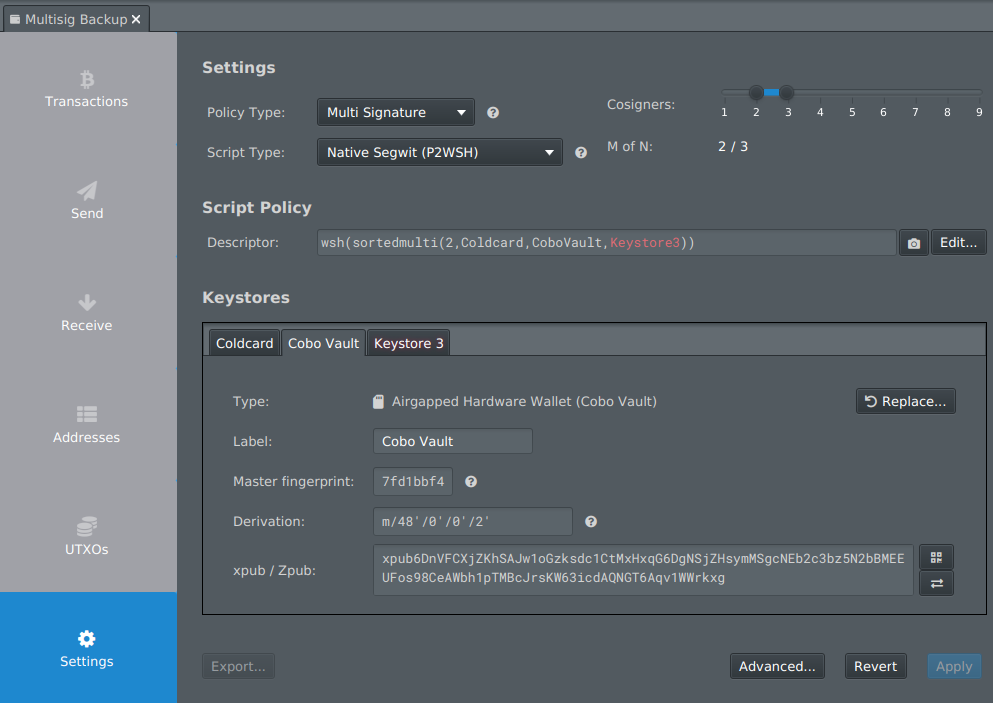
- In Sparrow, select
Keystore 2>Air Gapped Hardware WalletthenScanfor the Cobo Vault Multisig option. This will open your computers camera, hold the device so that the QR code on the Cobo can be read
Specter DIY Import
- In Specter DIY tap
Master Public Keys>Multisig. The screen should then show a QR code
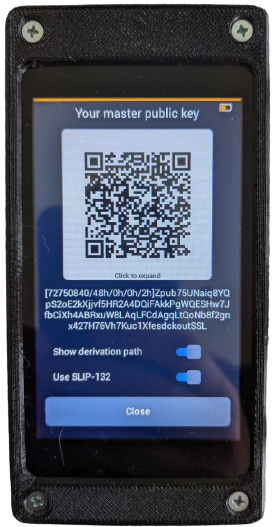
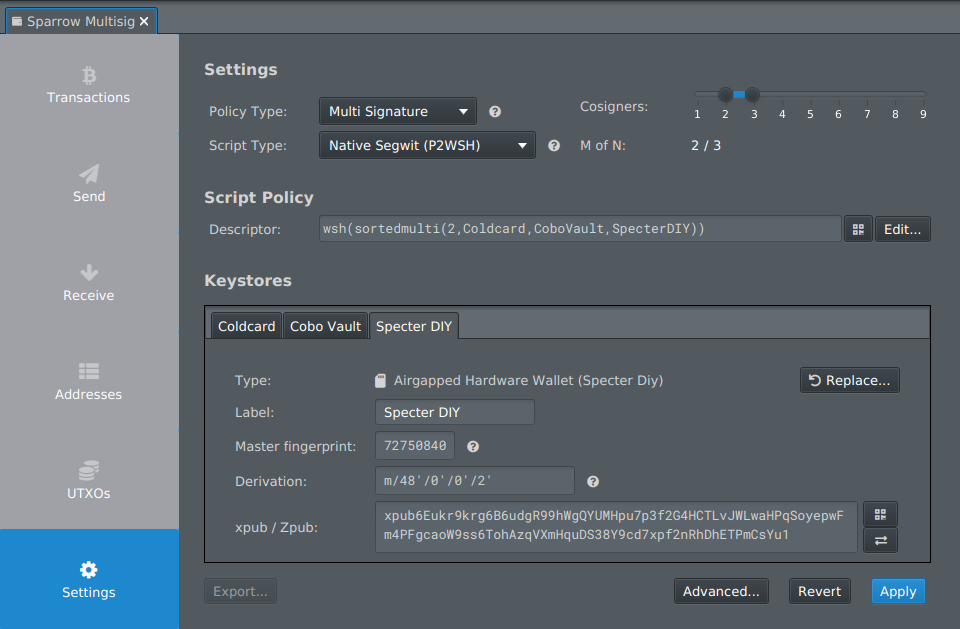
- In Sparrow, select
Keystore 3>Air Gapped Hardware WalletthenScanfor the Specter DIY Multisig option. This will open your computers camera, hold the device so that the QR code on the Specter DIY can be read
- Click
Applythen set an optional password to secure your wallet
Notifying signers
Now that the wallet is created, we need to notify each signer of the wallet creation.
Notify Coldcard
- Press
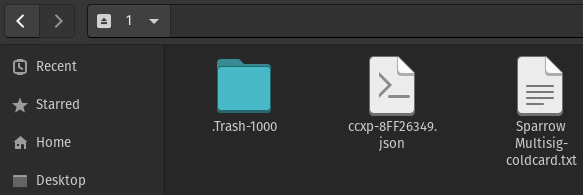
Export>Export Filenext to Coldcard Multisig - Insert the Coldcard micro SD card into your computer and copy the generated
.txtfile onto it - Remove the SD card and insert back into your Coldcard
- Power on your Coldcard and enter your PIN. Go to
Settings>Multisig Wallets>Import from SD.
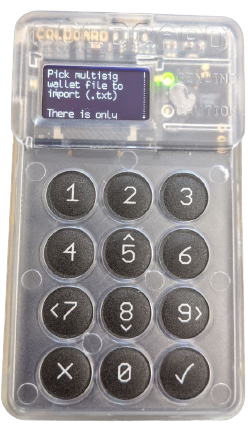
- There will only be one to choose from
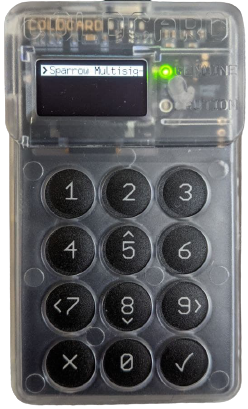
- Check all details shown on the device match those shown in Specter and then confirm
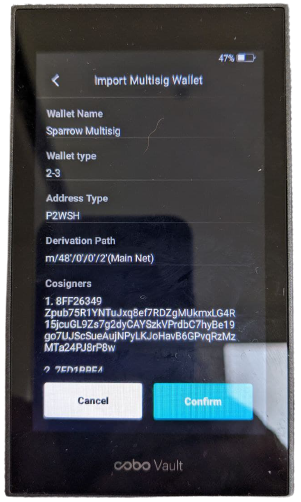
Notify Cobo
- Press
Export>Shownext to Cobo Vault Multisig - On the Cobo open the menu then press
Multisig Wallet>Import Multisig, then tap the QR scanner button in the top right
- Scan the QR code being displayed by Sparrow then check the public key information shown on the device matches those displayed in Sparrow
Notify Specter DIY
This is not currently supported in Sparrow. However it is sufficient to verify receive and change addresses on the other two signing devices.
Backup
Multisig backups are more complex than their single signature counterparts. You can read an in-depth look at this here.
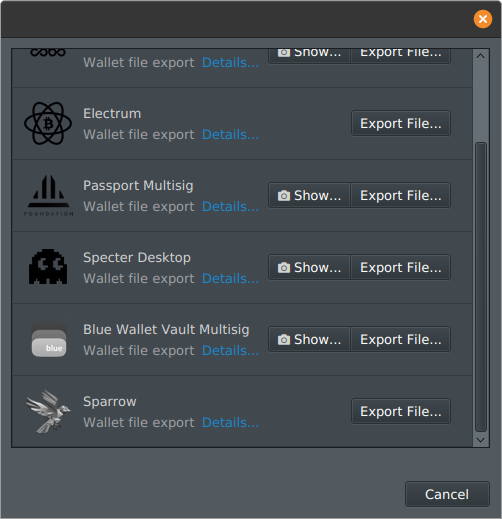
- In Sparrow click
Export>Export Filenext to Sparrow - If your wallet is not password protected, this will create a
.jsonfile that you can back up onto as many SD cards as you like - If the wallet is password protected this will download a copy of your encrypted wallet file which you can open in Sparrow
This file is a ‘view only’ into your multisig wallet. To spend you still need m-of-n signers or seed backups
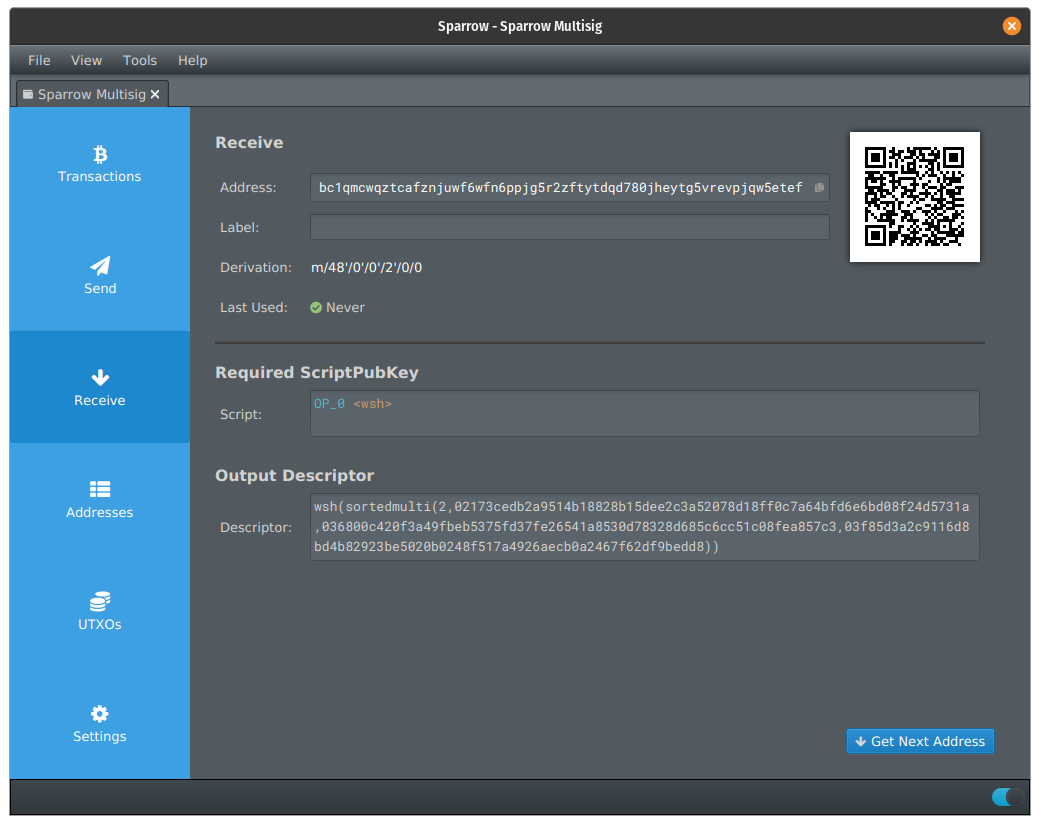
Verify Receive Addresses
You will have already noticed that Sparrow shows you your first receive address. It is now important to verify that receive address on our trusted signing devices. Not all signing devices facilitate this, which is the reason both Coldcard and Cobo were included into this guide.
Sparrow
- Click into the receive tab and your first receive address will be shown
Coldcard
- Power on your Coldcard and enter your PIN. Press
Address Explorer. scroll to the bottom and enter the number indicated to start - Scroll to the bottom of the next page and choose your recently imported multisig wallet
- You will now have the option to save these to the SD card which could be useful if you plan on receiving often and wont have easy access to your devices
- Scroll down, you will see the fingerprint of each signer, after that you should see a partially hidden version of your first receive address. Check it matches the one shown by Sparrow
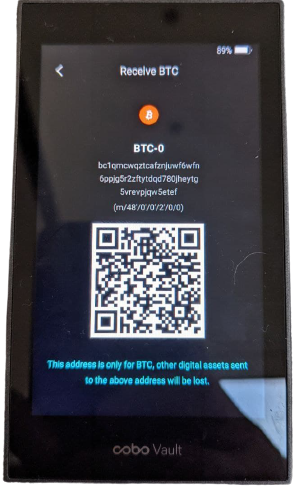
Cobo Vault
- Open the menu and press
Multisig Walletwhich will open the receive tab. Press the top address and check it matches the one shown in Sparrow
All 3 match? Send a very small amount of sats to your verified address
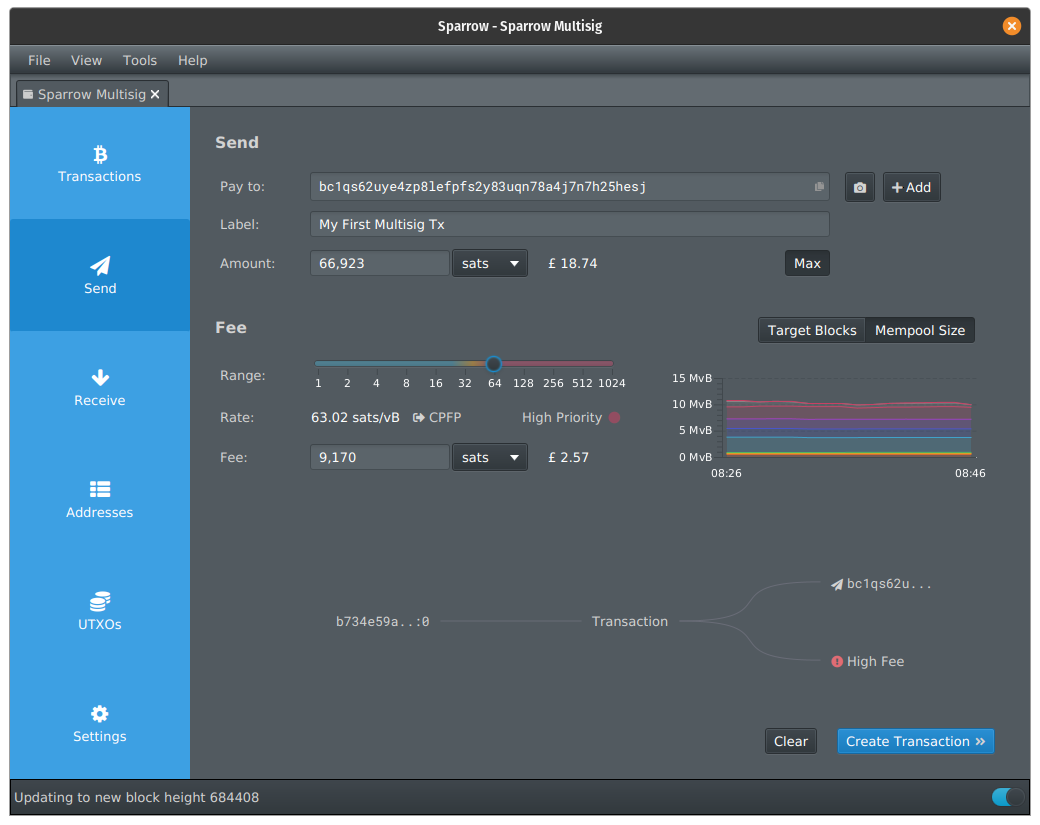
Spending
- Create the transaction in the same way described earlier then press
Create Transaction
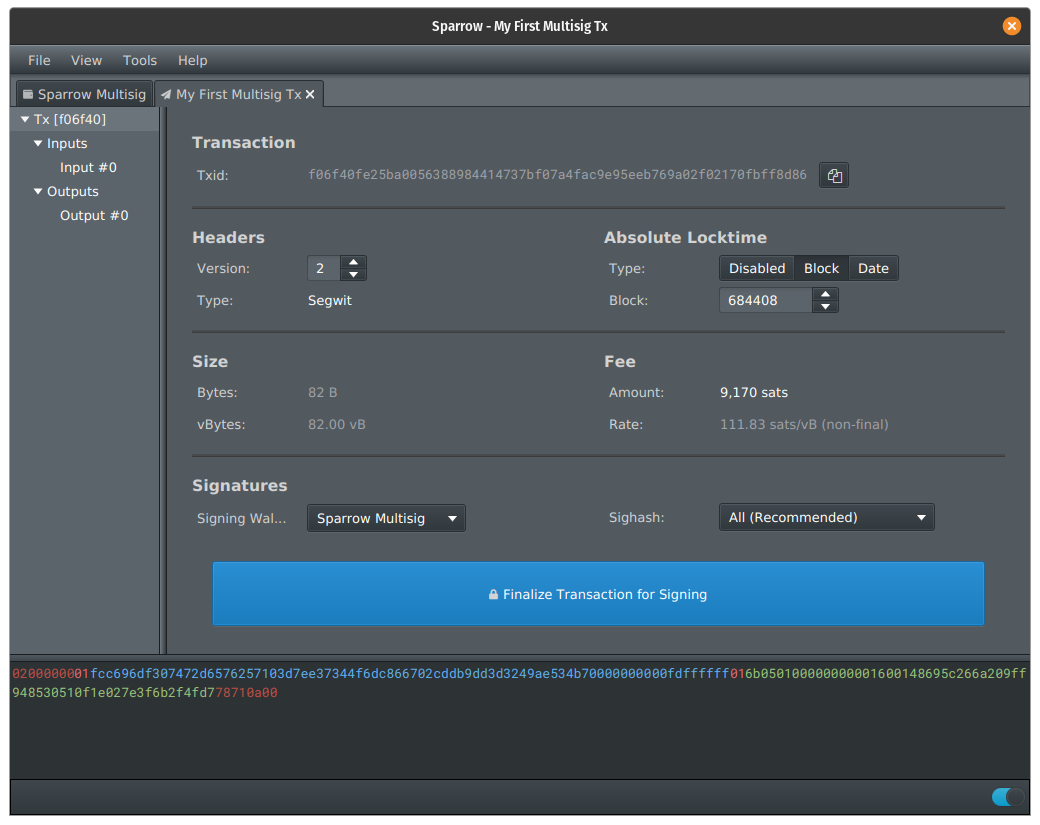
- Review the transaction details then click
Finalize Transaction for Signing
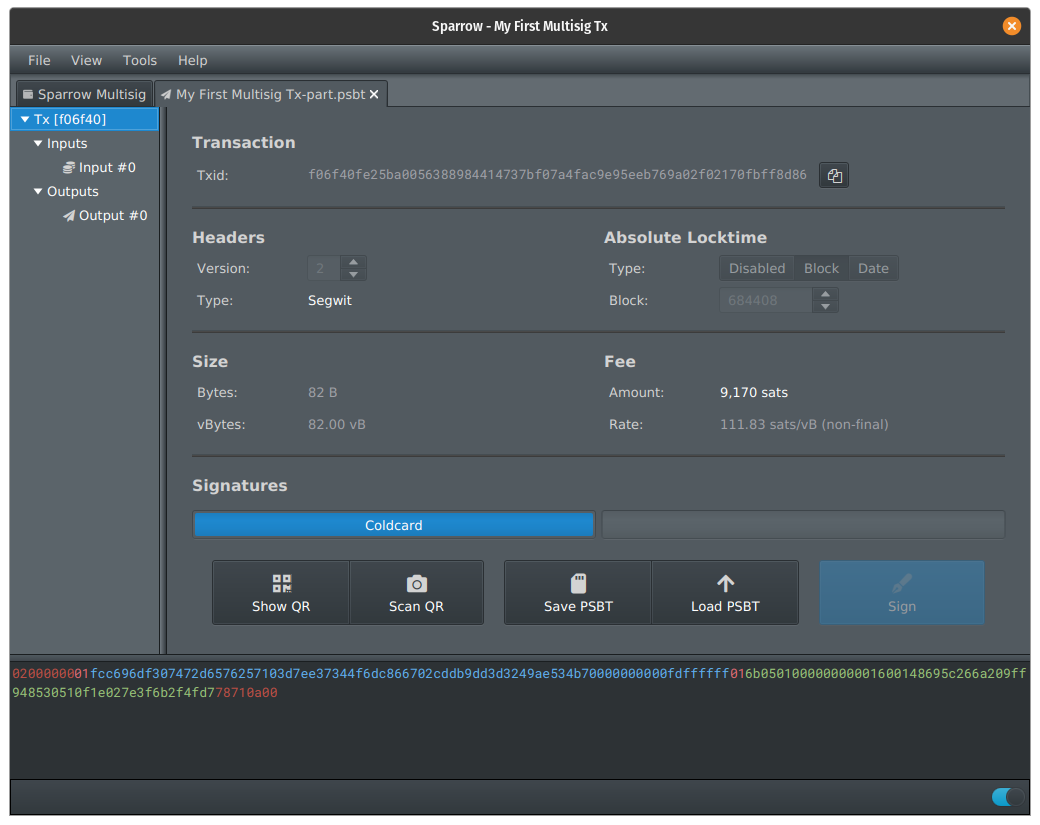
Sign with Coldcard
- Click
Save PSBTand select the SD card as the save location - Pass the SD card back to your Coldcard and click
Ready to Sign - Choose the file name of the
.psbtfile you just saved from Sparrow - Review the transaction details and press
sign - The Coldcard will now save a
signed.psbtfile to the SD card - Pass the SD card back to your computer
- In Sparrow, click
Load PSBT, choose thepart.psbtfile
We now have 1 of a required 2 signatures
Sign with Cobo Vault
- In Sparrow, click
Show QR - On Cobo Vault, open your multisig wallet and press the QR scanner button
- Scan the QR code displayed by Specter with the device
- Review the transaction details, confirm and enter your password. The device will then show an animated QR code on screen
- Inn Sparrow, click
Scan QR, this will open your computer’s camera. Hold the Cobo device up to the camera for Sparrow to read the signed transaction
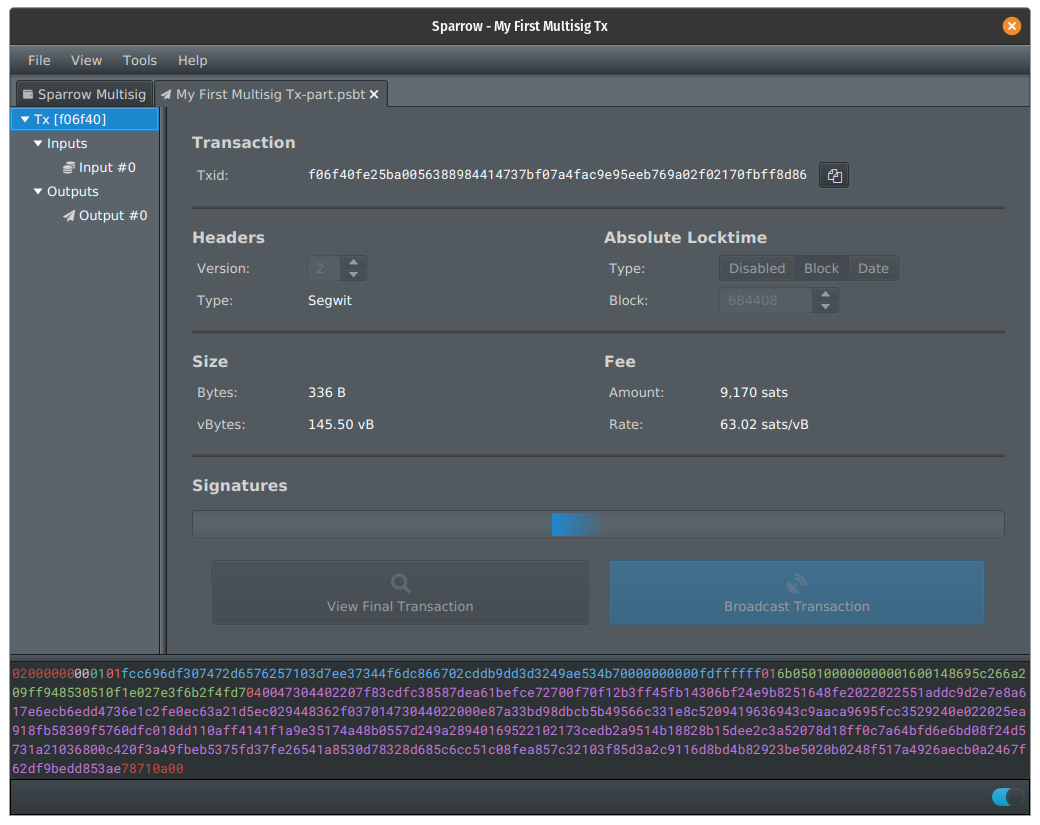
We now have 2 of a required 2 signatures
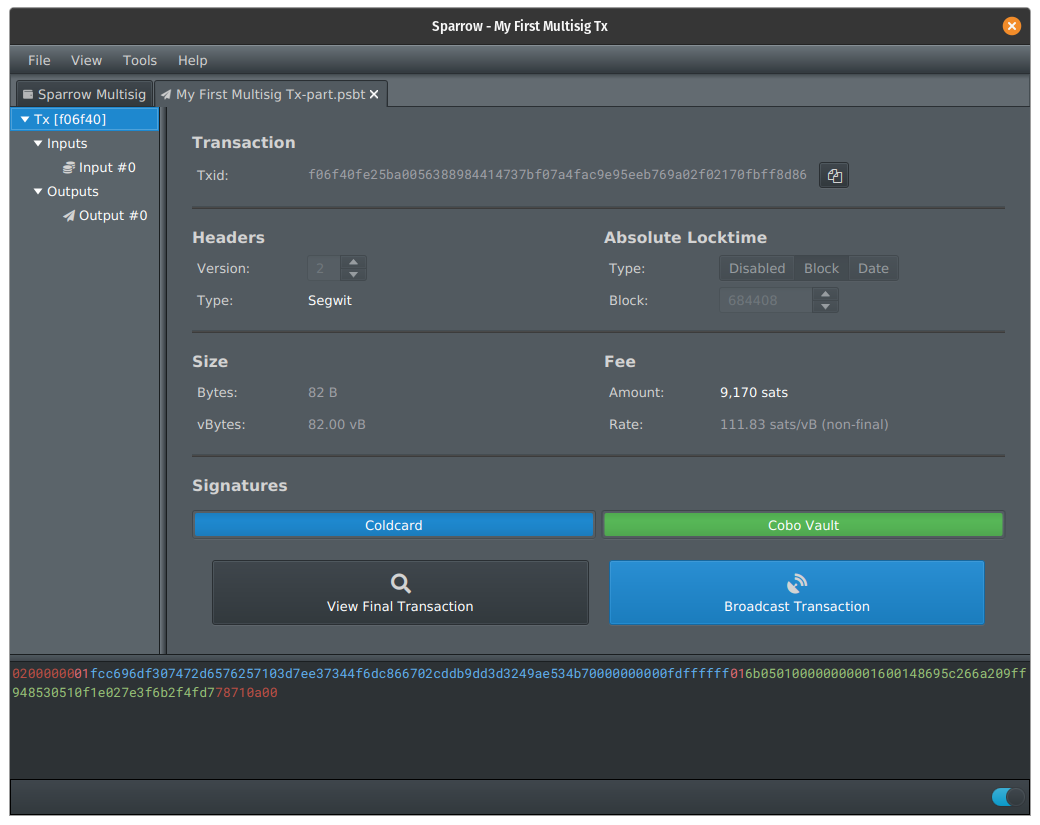
- Click broadcast transaction to sned the signed multisig transaction to the network
Where can I learn more?
If you want to try Sparrow Wallet for yourself visit their website and for the more technical user that wants to look under the hood, visit their GitHub. You can also follow them on Twitter to stay up to date with the latest developments.
If you need help getting started with Sparrow, I offer private support calls for those that benefit from more personalised tuition.
Disclaimer - All views expressed in this article are my own and not those of the Sparrow team.