
What is Passport?
Passport is a completely open source hardware wallet designed by the Foundation Devices team. Passport is designed to keep your Bitcoin private keys safe and secure whilst also making interacting with them as smooth as possible. Passport leverages much of its base level firmware and functionality from the Bitcoin hardware wallet titan Coldcard and much like the Coldcard, is designed with the utmost security in mind. Passport aims to package this experience in a polished looking product that appeals more to the less ‘tech savvy’ user.
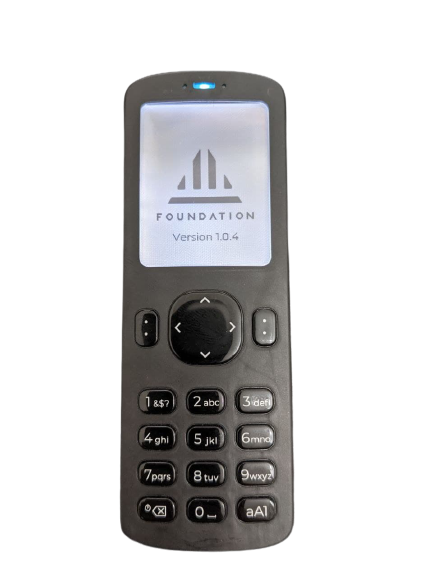
Passport front view
Why use Passport?
Passport keeps maintains its focus on generating and securing your Bitcoin private keys in a completely offline manner. To support this endeavour, the device comes with absolutely zero ports for cables, not even for power! The device runs on 2x AAA batteries (supplied with the device) and communicates with the outside world via QR codes or a microSD card (2x industrial grade supplied with the device). Passport leverages the security best practice of ‘air gapping’, this practice allows the device to communicate with wallet software like Sparrow or Blue without ever needing to be physically connected to your internet connected laptop or phone.
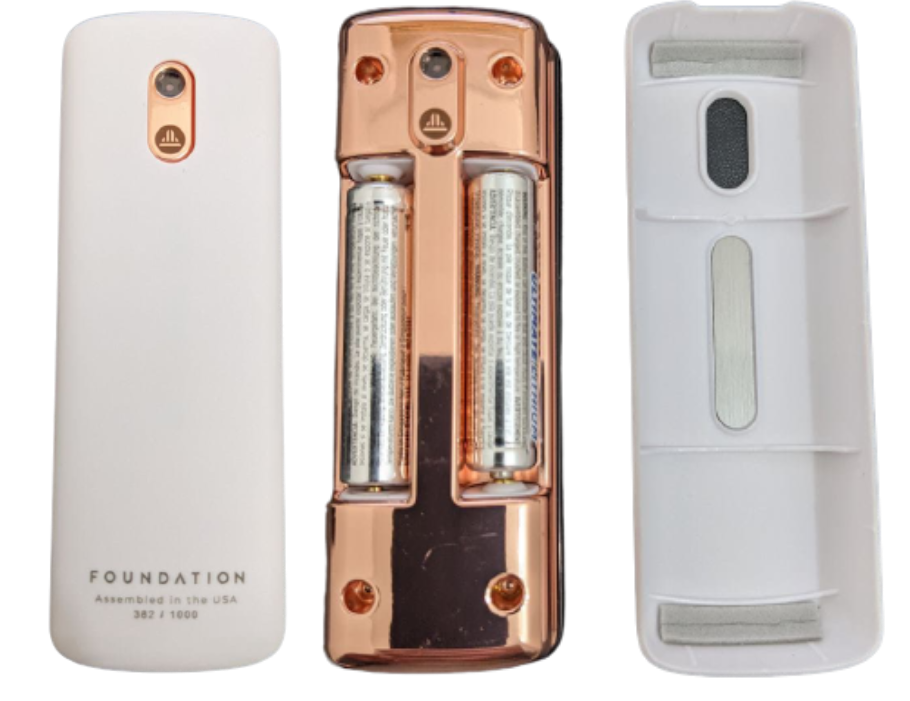
Rear of device with and without the magnetic rear cover
The Passport bears resemblance to an old style Nokia mobile phone which might help it go undetected to the untrained eye! The device itself comes in at just 4 inches tall and boasts a ‘T9’ style keypad which makes long passphrase entry easier than some of its competitors. The menu system is simple and easy to navigate and the UI is very responsive to inputs made via the keypad. Newer users will find the guided ‘Pair Wallet’ screen useful for pairing their Passport to the following wallet software: -
- Bitcoin Core
- Blue Wallet
- BTC Pay
- Electrum
- Sparrow
- Wasabi
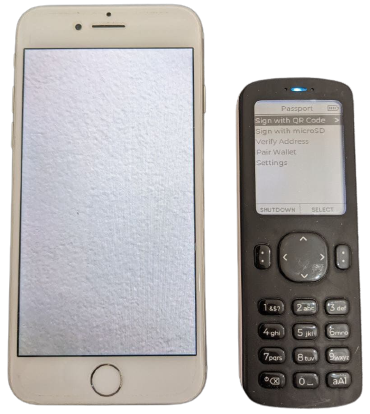
Size comparison with an iPhone 7
Features
Below is a brief run down of the Passport’s main features. You can find more detail on their documentation page.
- Tamper evident packaging (For supply chain attacks)
- Pair wallet screen (For simple connection to multiple pieces of wallet software)
- Full keypad (Easy to enter passphrases or seed words)
- BIP174 (Partially signed bitcoin transactions)
- QR Code Scanner *(For easy importing/exporting wallets, signing transactions and verifying addresses)
- BIP39 (Optional passphrase)
- Anti-Phishing words (Highlights device tampering)
- Encrypted backups (Create multiple encrypted SD card backups)
- Multi-sig support (Create and participate in multi signature wallets)
- Multi account support (Allows for segregation of funds under the same seed)
How does it work?
Passport can be used with all popular desktop software and also works well with Blue Wallet. For the the rest of this guide I will walk you through the process of using your Passport with Sparrow Wallet, an incredibly feature rich desktop wallet worth checking out. Whilst not absolutely essential, I would advise anyone using Sparrow to do so with their own back end server. This will enable you to preserve your transactional privacy and be a more sovereign bitcoiner!
The rest of this guide will be broken down into the following steps: -
Initial Set Up
Validation + PIN
- When you receive your Passport, check there is no evidence of tampering with the blue security seal which is found on the outer box. Any attempt to peel this off will leave behind clues on the box itself that state
Voidand/orOpened - Place the two provided batteries into the rear of the device and power it on using the button in the bottom left of the keypad
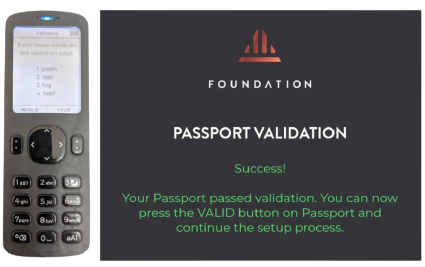
- Visit the Foundation Devices validation page and scan the QR code shown with Passport
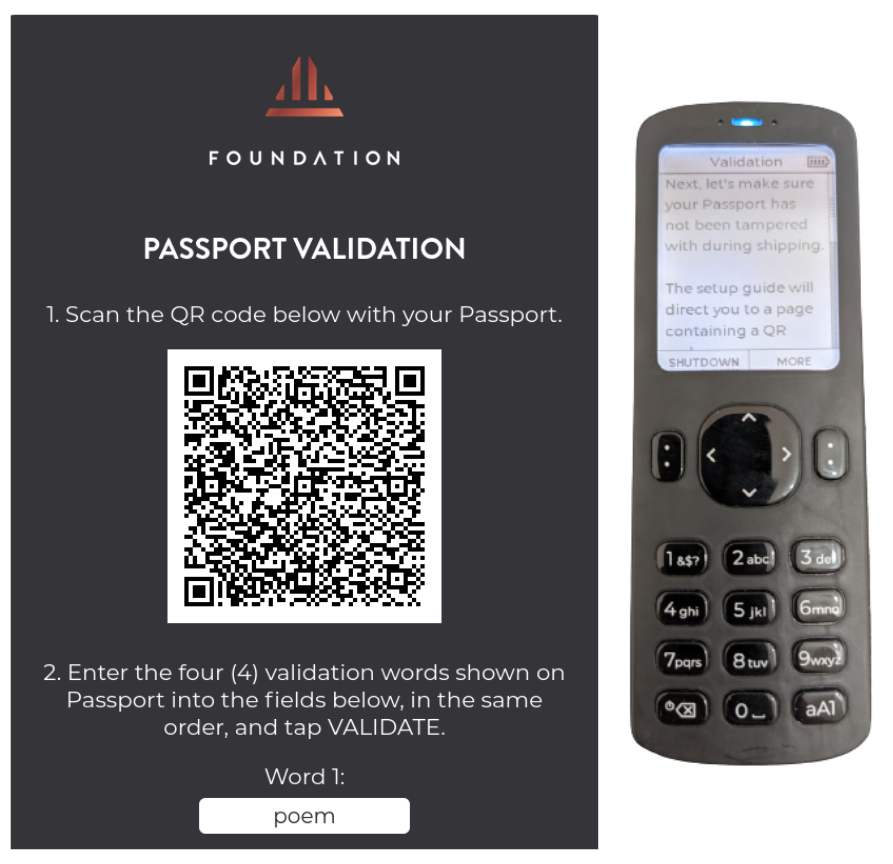
Validation Screen
- The device will then show 4 words. Enter these four words into the validation website and look for the
Success!message. Press theVALIDbutton on the Passport to confirm *
Validation Screen #2
- Now it’s time to create you PIN. The pin is broken into two parts, after the first four letters you will be shown two security words. Write these down or ensure you remember them, they will serve as a warning in the event that your device is ever tampered with.
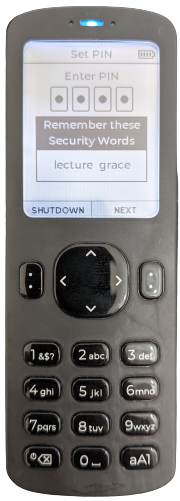
Security words
- You should then be greeted with the main landing screen. Hold fire on creating a new seed for now, first we need to ensure your Passport is running the latest firmware.
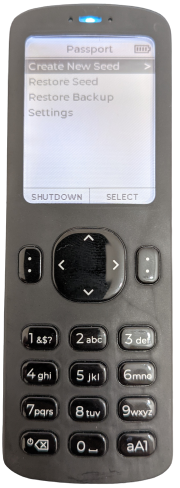
Landing screen
Upgrade Firmware
- Check the current firmware on the device by heading to
Settings>Firmware>Current Version
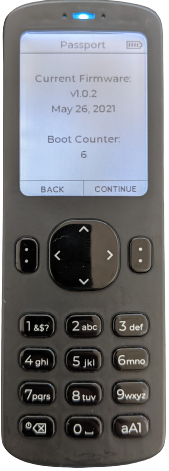
Current firmware
- Check the latest version here. If there is a more recent version that the one shown on your device, download the
.binfile to your computer - In the Terminal window (Mac + Linux only), open the folder you downloaded the
.binfile to and runsha256sum passport-fw-1.0.4.binand check that the resulting hash matches the one displayed on the Foundation Devices release page. An exact match will confirm that the contents of the file you have downloaded are an exact match to the one the developer produced
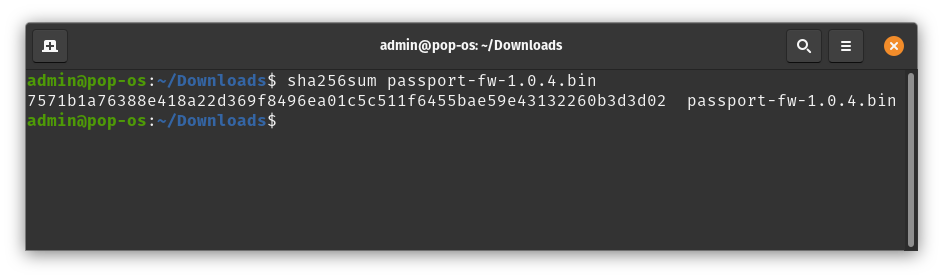
Hash result
- Insert one of the provided industrial microSD cards into your computer and drop the
.binfile onto it - Eject the microSD and insert into the Passport, ensuring that the gold contacts are facing you
- Initiate the firmware update by going to
Settings>Firmware>Update Firmwarethen choose the file you just copied onto the microSD

Updated firmware
Create a Seed
- This is as simple as tapping
Create New Seed. The device will then randomly generate a set of seed words and save them to the device’s memory.
There is currently no option to add your own entropy to the seed generation stage, though this is on the team’s roadmap. If you don’t want to wait for this feature and also don’t want to trust the device’s seed generation, you can import your own via the
Restore Seedoption
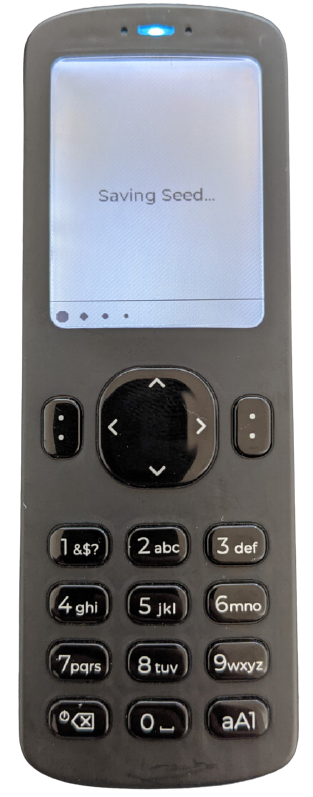
Seed generation
- For a smoother onboarding process, the device does not display your seed words at this stage. Instead it will prompt you to create and encrypted backup onto one of the provided microSD cards
- During this process the device will show you a 6 word password for decrypting the backup file. Ensure you make a note of this password, without it you will not be able to recover using this file!
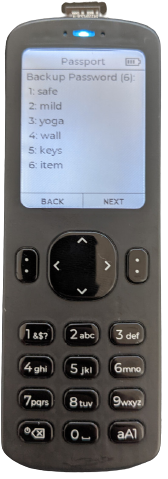
Encrypted backup password
View Seed Words
- To view the generated seed words go to
Settings>Advanced>View Seed Words. Make a copy of these seed words onto a robust storage medium.
Anyone with access to this, has access to your bitcoin. Keep it somewhere secure!
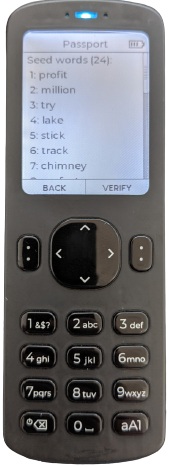
Seed word display
Pairing with Sparrow Wallet
The following steps are going to import a ‘Watch Only’ version of your Passport’s wallet into Sparrow. From then on Sparrow can receive bitcoin to addresses controlled by your Passport, but cannot spend from them without a valid signature which can only be provided by Passport. If you’d like to familiarise yourself with Sparrow Wallet before moving forward, you can do so here.
- Open Sparrow and click
File>New Walletthen give your new wallet a name
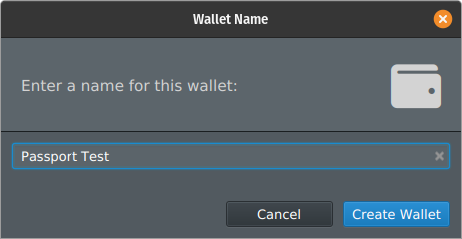
Wallet name
- Select
Airgapped Hardware Wallet
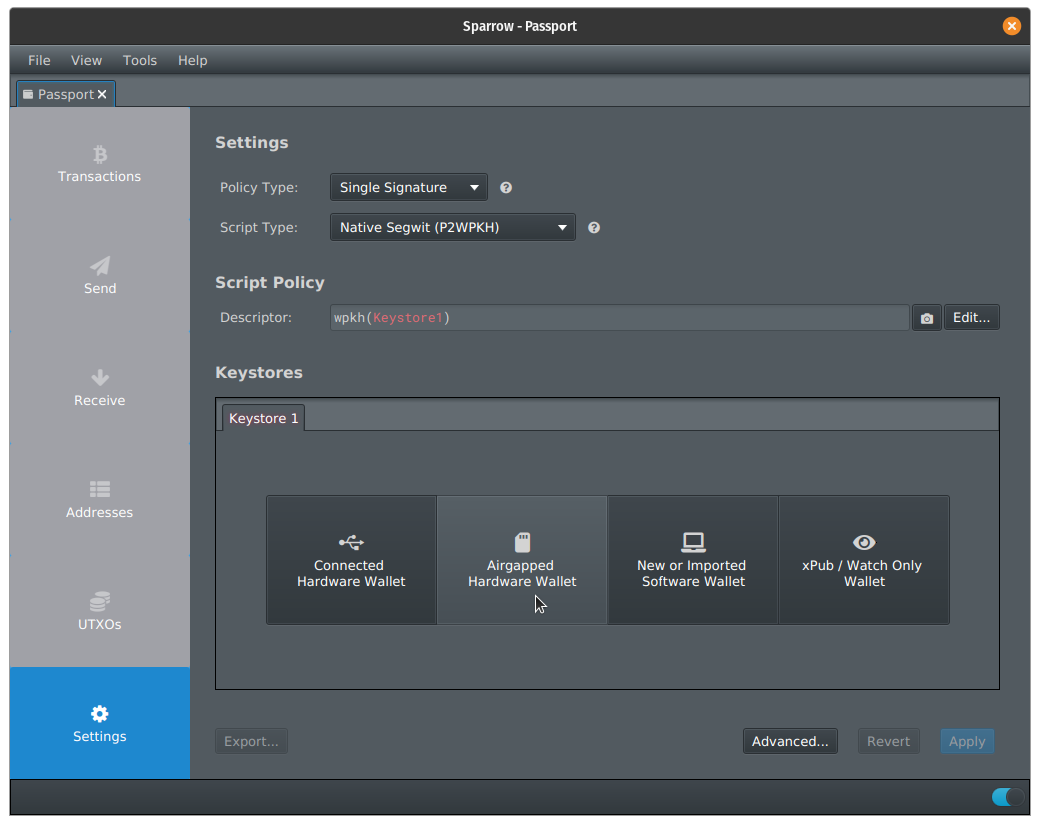
Wallet type selection
- Selecting
Scannext to the Passport icon will open your computer’s camera
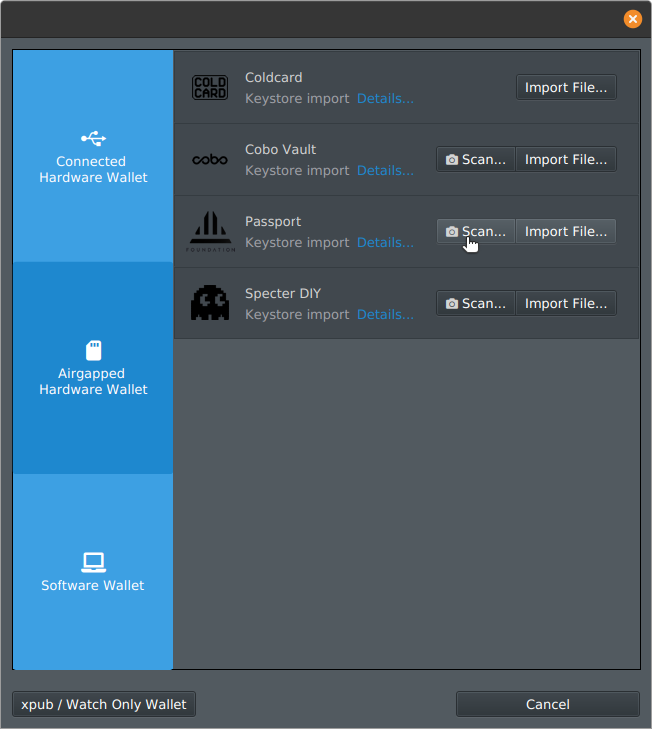
Wallet import method
- On Passport go to
Pair Wallet>Sparrow>Single Sig>QR Code. The device will then display a QR code containing the wallet data to be received by Sparrow. Hold Passport up to your computers camera to be read.
Ensuring you are in a well lit environment will help the scan process
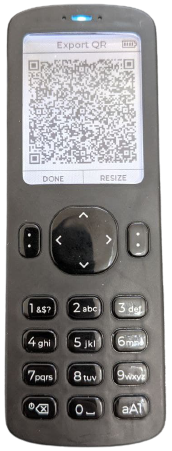
Wallet export QR code
- Double check the information provided then click
Apply.

Final wallet import screen
- To finalise the export process, Passport will verify a receive address generated by Sparrow. This confirms that the intended wallet has been imported onto your computer
- In Sparrow, open the receive tab
- On Passport click
Continuethen scan the QR code generated by Sparrow using the camera on your Passport
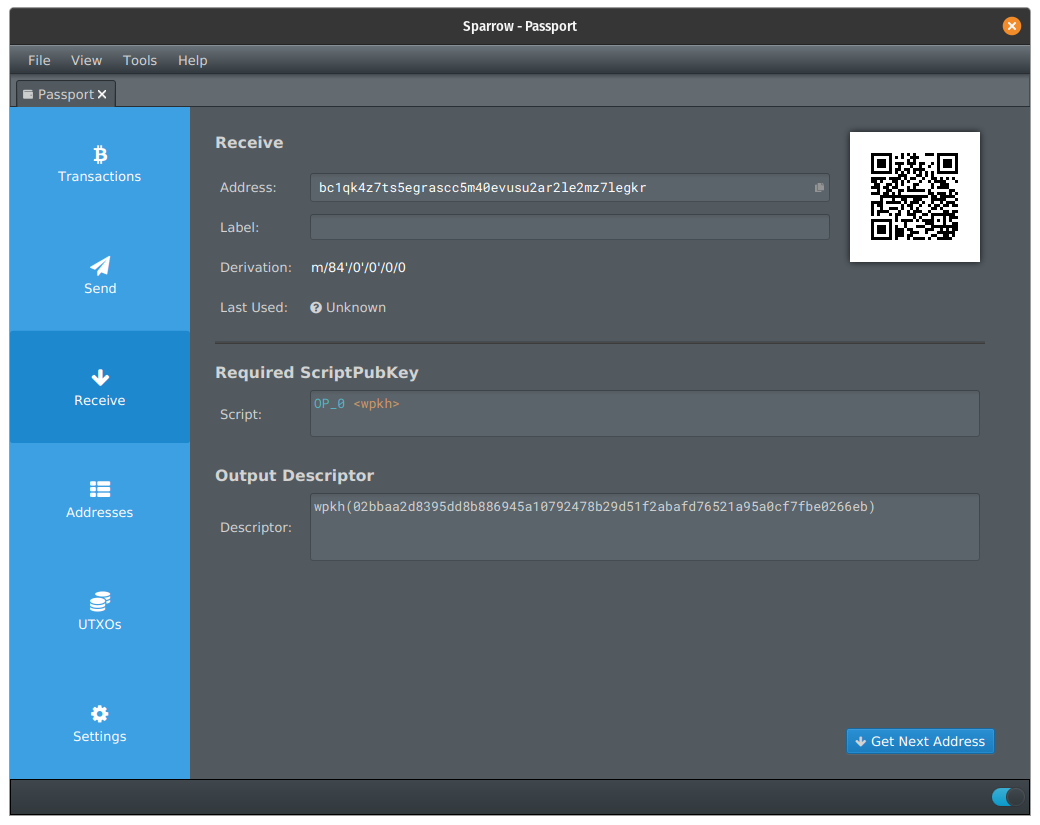
Sparrow receive tab
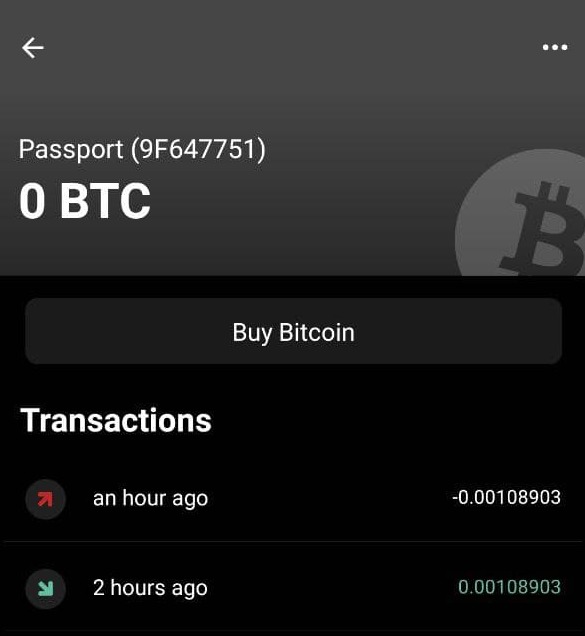
Receiving a Transaction
- Receiving bitcoin is simple as we have already verified our first receive address during the previous step. Simply copy the address shown by Sparrow and share with the sender for them to construct their transaction. Alternatively they can scan the QR code shown
- After a short wait (depending on the fee rate you choose) your first transaction will appear in Sparrow
- To see your next unused address click
Get Next Address
Always send a small test amount before making any large deposits!
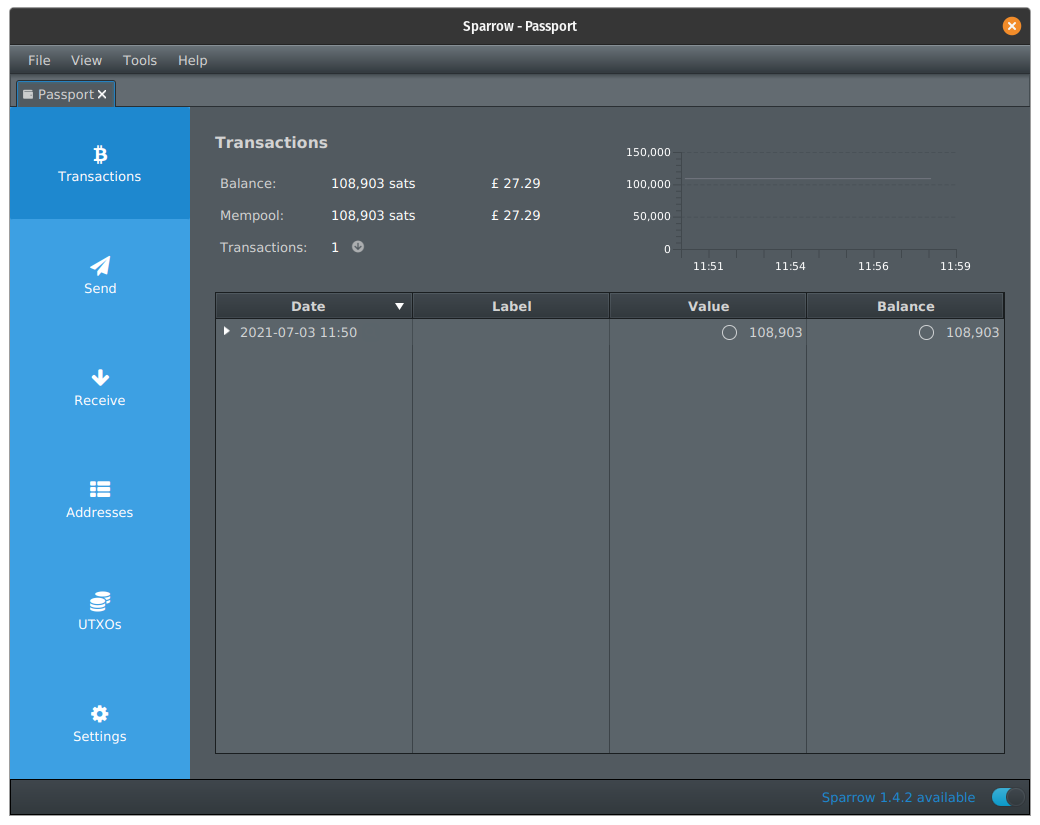
Sparrow transaction tab
Sending a Transaction
- Open the
Sendtab in Sparrow - Paste the address you are sending to
- Give the transaction a label
- Enter the amount you want to send and adjust your fee rate
- Click
Create Transaction
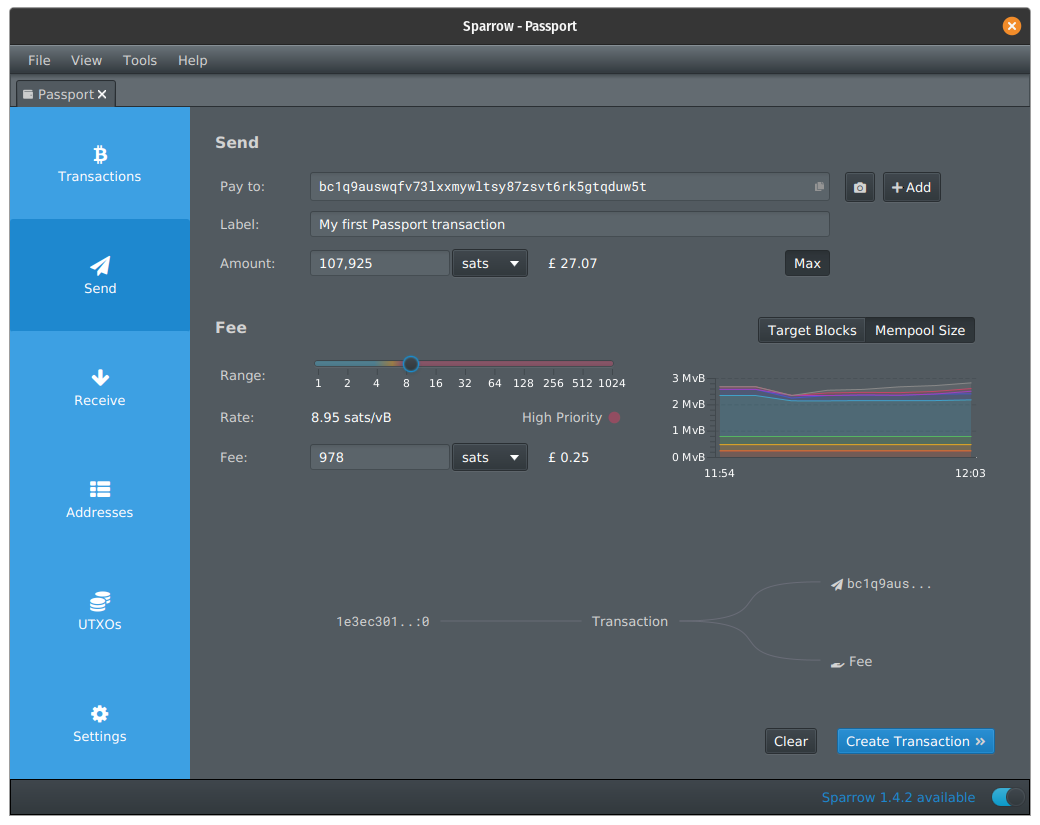
Send tab
- The next screen provides an incredibly detailed breakdown for the more advanced user to fine tune the more technical details where required. For most users the default settings will be fine, click
Finalize transaction for signing
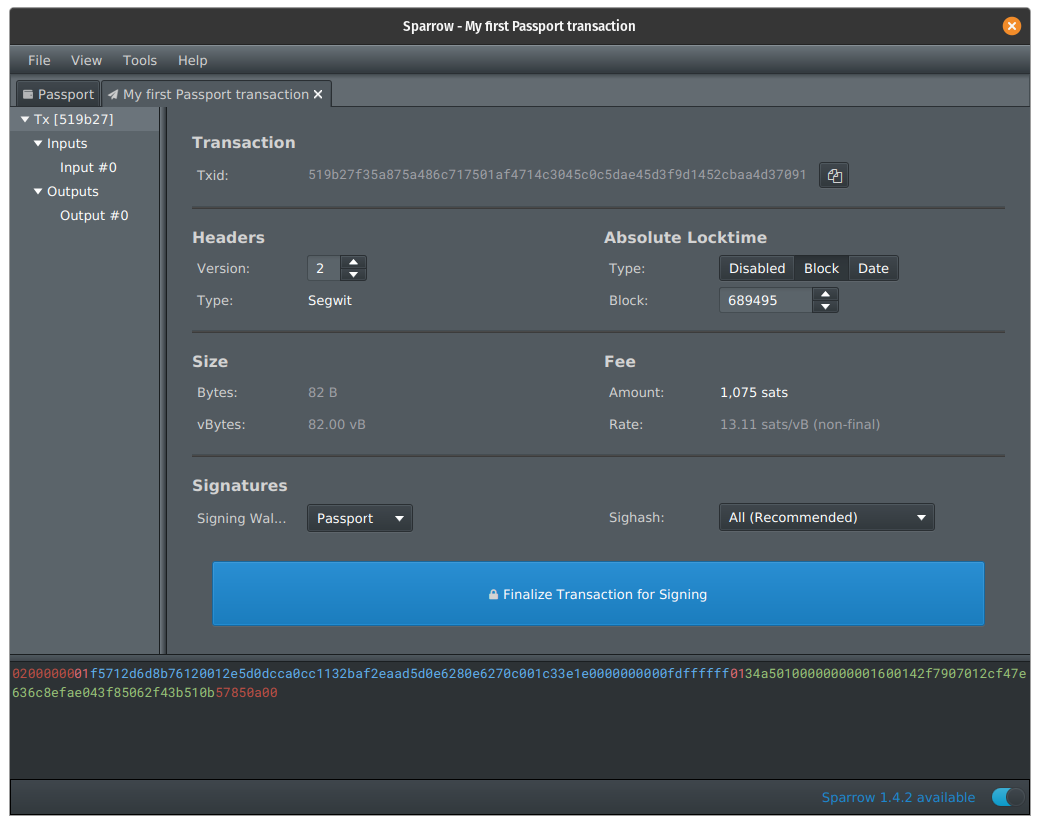
Finalize transaction screen
- Click
Show QR - On your Passport click
Sign with QR Codeand scan the animated QR being displayed by Sparrow

Transaction waiting to be signed
- Review the transaction details match those intended then click
Continue>Sign. The device will then show an animated QR code containing the details of the (now signed) transaction, ready for broadcast to the Bitcoin network
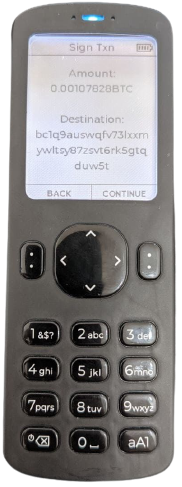
Transaction review screen
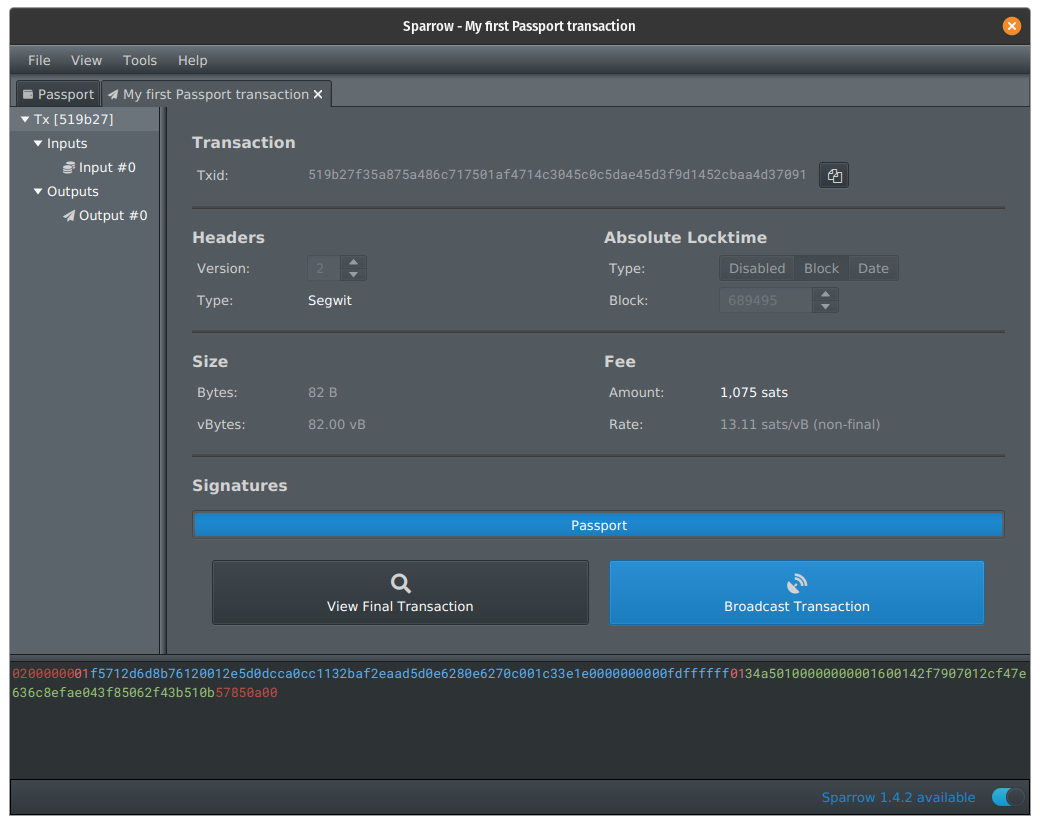
- In Sparrow click
Scan QRto open your computer’s camera - Hold the Passport up to your computer’s camera to pass the signed transaction data back to Sparrow
- Have one final check of the transaction details then click
Broadcast Transaction
Broadcast transaction
Congratulations, you just sent a 100% air-gapped transaction!
Other Features
Before sending any significant amount of bitcoin to your Passport you should be 100% comfortable with both recovery methods. Complete the following steps after sending a very small amount into your Passport wallet.
- Seed words
- Encrypted backup file
Restore from seed
- Ensure you have made a copy of your seed words as outlined here
- Make a note
- Go to
Settings>Advanced>Erase Passport - Enter your PIN and click
Restore Seed - Carefully enter your seed words
- Verify a receive address shown by Sparrow to confirm you have restored the correct seed
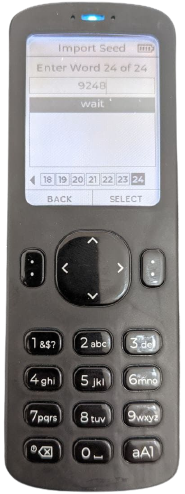
Seed word entry
Restore from backup file
- Ensure you have an encrypted backup and corresponding password as outlined here
- Go to
Settings>Advanced>Erase Passport - Insert the microSD card that contains the backup file you created earlier
- Enter your PIN and click
Restore Backup - Choose your backup file and enter your 6 word password. The device will then reboot
- Verify a receive address shown by Sparrow to confirm you have restored successfully
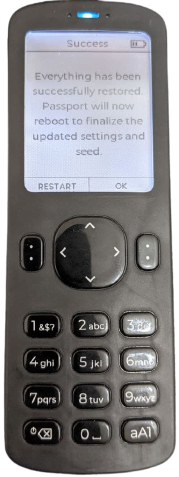
Backup file restore
Add a passphrase
A passphrase is an additional word or phrase that is added to your original seed to creates a completely separate wallet. It can be used as an extra layer of security in case your seed phrase becomes compromised. Without both your seed and your passphrase an attacker cannot access your bitcoin.
- Go to
Settings>Advanced>Passphrase>Enabled - Restart the device and enter your PIN
- Enter your passphrase and click
Apply - The device will notify you that a passphrase is applied with a
Pon top of a shield in the top left corner of the screen
You need to specify your passphrase each time you boot the device. Lose or forget your passphrase and you lose access to all of the bitcoin in that wallet
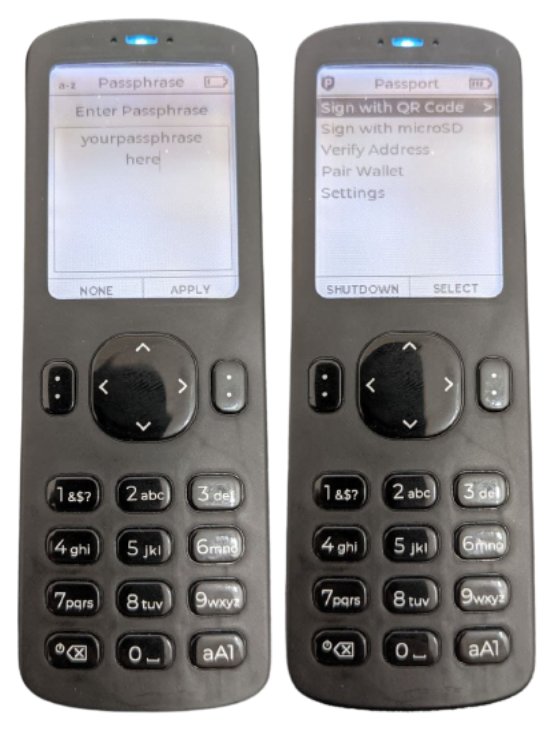
Passphrase application
Verify Address
When using a hardware wallet with an piece of external software like Sparrow or Specter, it is important that you verify the receive address it generates for you. Verifying this on your trusted, offline device (your Passport) you can be sure that your chosen software is acting in good faith. Doing this in Passport is easy…
- Tap
Verify Addressand scan the QR code provided by your chosen wallet software
Pair to Blue Wallet
Using Passport with Blue Wallet provides a great solution for receiving on the go, directly into your cold storage. Connection couldn’t be easier…
- On Passport go to
Pair Wallet>Blue Wallet>Single-sig>QR Code - In Blue Wallet tap
Add Wallet>Import Wallet>Scan or import a file - Scan the QR code being displayed by Passport
- Tap
Receivein Blue Wallet and scan the QR code with your Passport to verify a successful import
As with Sparrow Wallet, the most private way to interact with Blue Wallet is to do so through your own node. Not doing so will share your transactional data with a third party
Blue Wallet
Where can I learn more?
If you want to try Passport for yourself visit their website and for more info on the features visit their documentation.
If you prefer video guides, check out the Foundation team’s YouTube
If you need help setting up your Passport, I offer private support calls for those that benefit from more personalised tuition.